Introduction
Coconut shrimp is a beloved appetizer that transports your taste buds to tropical paradises with every crunchy bite. This dish, typically deep-fried, combines the sweetness of coconut with tender shrimp, creating a delightful contrast that has made it a staple on both restaurant menus and at home gatherings. Whether served as a starter at a dinner party or enjoyed as a snack during a beach day, coconut shrimp has earned its place in the hearts of seafood lovers everywhere.
In recent years, the air fryer has revolutionized the way we prepare our favorite fried foods, allowing us to enjoy the crispy textures we crave while significantly reducing the amount of oil used in cooking. This healthier cooking method not only cuts down on calories but also retains the essential flavors and textures that make dishes like coconut shrimp so appealing. With the air fryer, you can achieve that golden-brown exterior and tender interior without the guilt that often accompanies traditional frying.
This recipe for Crispy Tropical Delight: Air Fryer Coconut Shrimp promises to deliver the same mouthwatering taste and crunch you love, while embracing the convenience and health benefits of air frying. As we dive into this culinary adventure, you’ll discover how to create a dish that brings the vibrant flavors of the tropics right to your kitchen.
—
Understanding the Ingredients
Creating the perfect air fryer coconut shrimp begins with selecting the right ingredients. Each component plays a crucial role in achieving that signature flavor and texture. Let’s break down the essentials:
Large Shrimp
The star of the dish is undoubtedly the shrimp. When it comes to coconut shrimp, the size matters – larger shrimp provide a more satisfying bite and can hold up better during the cooking process. Look for fresh, high-quality shrimp that are firm and have a slight ocean scent. If you’re using frozen shrimp, ensure they are properly thawed and dried before cooking to ensure a crispy coating.
Sweetened Shredded Coconut
This ingredient adds the characteristic tropical flavor and texture that makes coconut shrimp so irresistible. Sweetened shredded coconut not only contributes sweetness but also enhances the overall flavor profile. It’s essential to use sweetened coconut for this recipe, as unsweetened varieties can lead to a more bland taste. The coconut can also caramelize slightly during cooking, adding depth to the dish.
Panko Breadcrumbs
To achieve that extra crunch, panko breadcrumbs are the go-to choice. These Japanese-style breadcrumbs are lighter and flakier than traditional breadcrumbs, which helps create a delightful crispiness when air-fried. The combination of panko with shredded coconut results in a perfect blend of crunch and sweetness that elevates the dish.
All-Purpose Flour and Eggs
These ingredients serve as the binding agents for the coating. All-purpose flour creates a dry layer that helps the egg wash adhere to the shrimp, while the eggs provide moisture and help the coconut and panko mixture stick. This combination is crucial for ensuring that the coating stays intact during cooking and provides a satisfying crunch.
Seasonings
A well-rounded flavor profile enhances the overall taste of your coconut shrimp. Garlic powder, onion powder, salt, black pepper, and chili powder contribute a savory depth that complements the sweetness of the coconut. Feel free to adjust these seasonings to your liking, adding more spice for a kick or toning it down for a milder taste.
Cooking Spray
To achieve that signature crispy finish without the excess oil, a light spray of cooking oil is essential. This step helps the coating brown beautifully and provides the necessary crunch, making your air-fried coconut shrimp just as enjoyable as their deep-fried counterparts.
—
Preparing the Shrimp
Before we dive into the cooking process, it’s essential to prepare the shrimp correctly. Proper rinsing and drying are key steps that will enhance the adherence of the coating and ensure the best possible results.
Step 1: Rinse the Shrimp
Start by rinsing the shrimp under cold water. This step helps to remove any residual ice (if frozen) or impurities that may affect the flavor. Gently pat the shrimp dry with paper towels, ensuring they are thoroughly dried. Excess moisture can cause the coating to become soggy, so this step is crucial for achieving that desired crispiness.
Step 2: Inspect for Freshness
When selecting shrimp, look for those that are firm to the touch and free from any off-putting odors. Fresh shrimp should have a mild scent, reminiscent of seawater. If you’re using frozen shrimp, ensure they are fully thawed and devoid of any ice crystals, as these can indicate they have been improperly stored.
Step 3: Remove the Shells and Tails
If your shrimp are not already peeled, remove the shells and tails. While the shells add flavor during cooking, they can be cumbersome to eat, especially for appetizers. If you prefer, you can leave the tails on for presentation, but be mindful that they can make the shrimp more challenging to coat evenly.
—
Setting Up the Dipping Stations
A well-organized kitchen is the key to a smooth cooking process, especially when it comes to breading shrimp. Setting up a three-station dipping station will streamline the coating process and ensure your shrimp are evenly coated.
Station 1: Dry Ingredients
In one shallow dish, combine the all-purpose flour with your choice of seasonings—garlic powder, onion powder, salt, black pepper, and chili powder. Mix these dry ingredients thoroughly with a fork or whisk to ensure even distribution of the flavors. This station will provide the first layer of coating, enhancing the flavor of the shrimp while acting as a base for the egg wash.
Station 2: Egg Wash
In a separate shallow bowl, crack one or two eggs and whisk them until well combined. The egg wash will help the breadcrumbs adhere to the shrimp, creating a cohesive coating. If you want a richer flavor and color, you can add a splash of milk or water to the egg mixture, but this is optional.
Station 3: Coconut and Panko Mixture
For the final coating, mix sweetened shredded coconut and panko breadcrumbs in a third shallow dish. This combination will create the crispy exterior that makes coconut shrimp so delicious. Ensure the ratio of coconut to panko is balanced – too much coconut can overpower the crunch, while too much panko can diminish the coconut flavor. Aim for an even texture that showcases both ingredients.
—
Once you have your shrimp prepared and your dipping stations set up, you’re ready to begin the coating process. Each step is essential to ensure a perfectly crispy and flavorful result. Stay tuned for the next part, where we will guide you through the exciting process of coating the shrimp and air frying them to golden perfection.
{{image_2}}
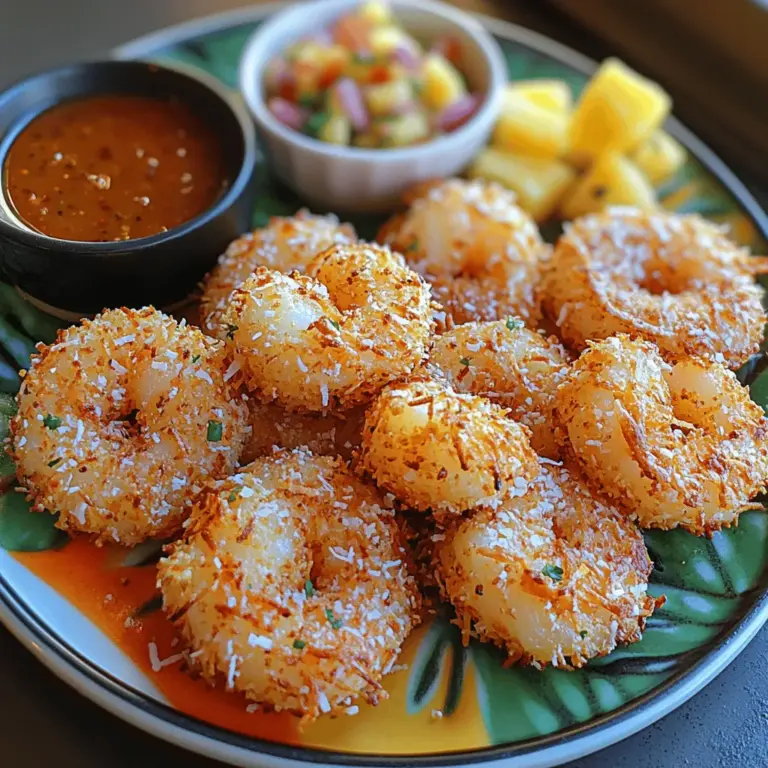
Proper Technique for Coating Shrimp
Coating shrimp properly is crucial for achieving that delightful, crispy texture that makes air fryer coconut shrimp a true crowd-pleaser. To start, make sure you have your shrimp peeled and deveined. The size of the shrimp can affect the cooking time, so choose medium to large shrimp for the best results.
1. Prepare Your Coating Station: Set up three shallow bowls in a row. In the first bowl, add your seasoned all-purpose flour. This will help the egg adhere better to the shrimp. In the second bowl, beat a couple of eggs to create an egg wash. In the third bowl, combine the panko breadcrumbs with shredded coconut, salt, and any additional spices you like, such as garlic powder or cayenne pepper for a bit of heat.
2. Coating Process: Begin by dredging each shrimp in the flour, ensuring it’s fully coated. Shake off any excess flour before dipping the shrimp into the egg wash. This step is vital; the egg should coat the shrimp evenly but without excess. Allow any drips to fall back into the bowl to prevent a soggy coating.
3. Final Coating: Transfer the shrimp to the bowl with the panko-coconut mixture. Press the mixture onto the shrimp firmly to ensure a good, even coating. This is where the magic happens; the panko provides a crunchy texture, while the coconut adds a delightful tropical flavor. Make sure each shrimp is well-coated, as this will lead to that coveted crispy bite.
Importance of Shaking Off Excess Flour and Egg
One common mistake when breading shrimp is not shaking off excess flour and egg. If you leave too much flour on the shrimp, it can create a gummy texture rather than a crisp one. Similarly, excess egg can lead to a soggy coating, which is the opposite of what you want. Always ensure that the shrimp are lightly coated in flour, then dipped in the egg, and finally coated in the panko-coconut mixture. This technique will ensure a beautiful, golden crust once they are air-fried.
Tips for Ensuring a Uniform Layer of the Coconut-Panko Mixture
To achieve that perfect, even layer of coconut-panko coating, consider the following tips:
– Use Fresh Ingredients: Ensure your panko breadcrumbs and shredded coconut are fresh, as stale ingredients can affect both flavor and texture.
– Press Firmly: When coating the shrimp, press down on the panko mixture to help it adhere better to the shrimp. This also ensures that the coating is uniform and thick.
– Air Dry: Allow the coated shrimp to sit on a wire rack for about 10 minutes before air frying. This drying time helps the coating adhere better, leading to a crunchier finish.
Preheating the Air Fryer
Preheating your air fryer is an essential step in achieving the best texture for your coconut shrimp. Preheating ensures that the shrimp begin cooking immediately when placed in the basket, which helps to create that crispy exterior.
– Recommended Temperature: Preheat your air fryer to 400°F (200°C). This high temperature is perfect for achieving a golden, crunchy coating while keeping the shrimp tender inside.
– Duration: Allow the air fryer to preheat for about 5 minutes. This short time is sufficient for most air fryers, but always refer to your manufacturer’s instructions for specific preheating guidelines.
Air Frying the Shrimp
Now it’s time to cook your beautifully coated shrimp. Follow these step-by-step instructions for optimal results:
1. Arrange the Shrimp: Place the coated shrimp in the air fryer basket in a single layer. Be sure to leave space between each shrimp to allow for proper air circulation. Overcrowding the basket can lead to uneven cooking and less crispiness.
2. Cooking Process: Set the air fryer to 400°F (200°C) and cook the shrimp for approximately 8-10 minutes.
3. Flip for Even Browning: Halfway through the cooking time, around the 4-minute mark, pause the air fryer and carefully flip each shrimp. This step is crucial for achieving an even golden color on both sides.
4. Check for Doneness: The shrimp are done when they are pink, opaque, and have a crisp coating. If you have a meat thermometer, the internal temperature should reach 120°F (49°C).
5. Avoid Overcooking: Keep an eye on the shrimp as they cook; overcooking can lead to a rubbery texture. Once they reach the desired color and crispness, remove them from the air fryer immediately.
Serving Suggestions
Crispy air fryer coconut shrimp can be served in various ways, making them a versatile dish perfect for any occasion. Here are some delightful serving suggestions:
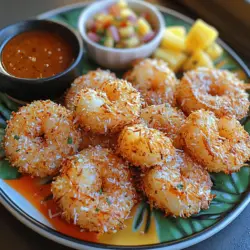
– Dipping Sauces: Pair the coconut shrimp with a variety of dips. Sweet chili sauce is a classic choice that complements the shrimp’s sweetness. The hint of heat balances beautifully with the rich coconut flavor.
– Pineapple Salsa: Create a fresh and fruity contrast by serving the shrimp with pineapple salsa. Combine diced pineapple, red onion, cilantro, lime juice, and a pinch of salt for a refreshing topping that enhances the tropical theme.
– Coconut Curry Dip: For a tropical twist, whip up a coconut curry dip. Mix coconut yogurt with curry powder, lime juice, and a touch of honey for a creamy, flavorful pairing that elevates the shrimp.
Nutritional Benefits of Air Frying
Air frying is a healthier alternative to traditional frying methods, which often involve large amounts of oil. Here’s how air frying maintains a balance of flavor and nutrition in this coconut shrimp recipe:
– Lower Calorie Count: Air frying uses significantly less oil, which reduces the overall calorie count of the dish. This method allows you to enjoy crispy shrimp without the guilt associated with deep-frying.
– Retained Nutrients: Cooking at high temperatures in an air fryer retains more nutrients compared to boiling or steaming. The quick cooking time means that the shrimp remain tender while maintaining their nutritional value.
– Heart Health: Air frying reduces the amount of unhealthy fats in your meals. By substituting traditional frying with air frying, you can enjoy delicious meals that are better for your heart.
Conclusion
In summary, the air fryer coconut shrimp recipe is not only simple and delicious but also a great way to incorporate tropical flavors into your cooking. With a few easy steps, you can achieve perfectly crispy shrimp that are sure to impress at gatherings or make for a delightful family meal.
This dish embodies the versatility of tropical ingredients, making it suitable for various occasions. Whether served as an appetizer or a main course, the combination of crispy coconut and succulent shrimp is bound to be a hit. Embrace the flavors of the tropics in your everyday cooking and enjoy the delightful taste of air fryer coconut shrimp.