Introduction
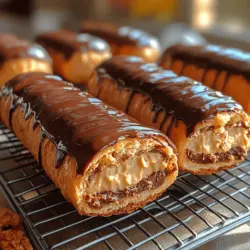
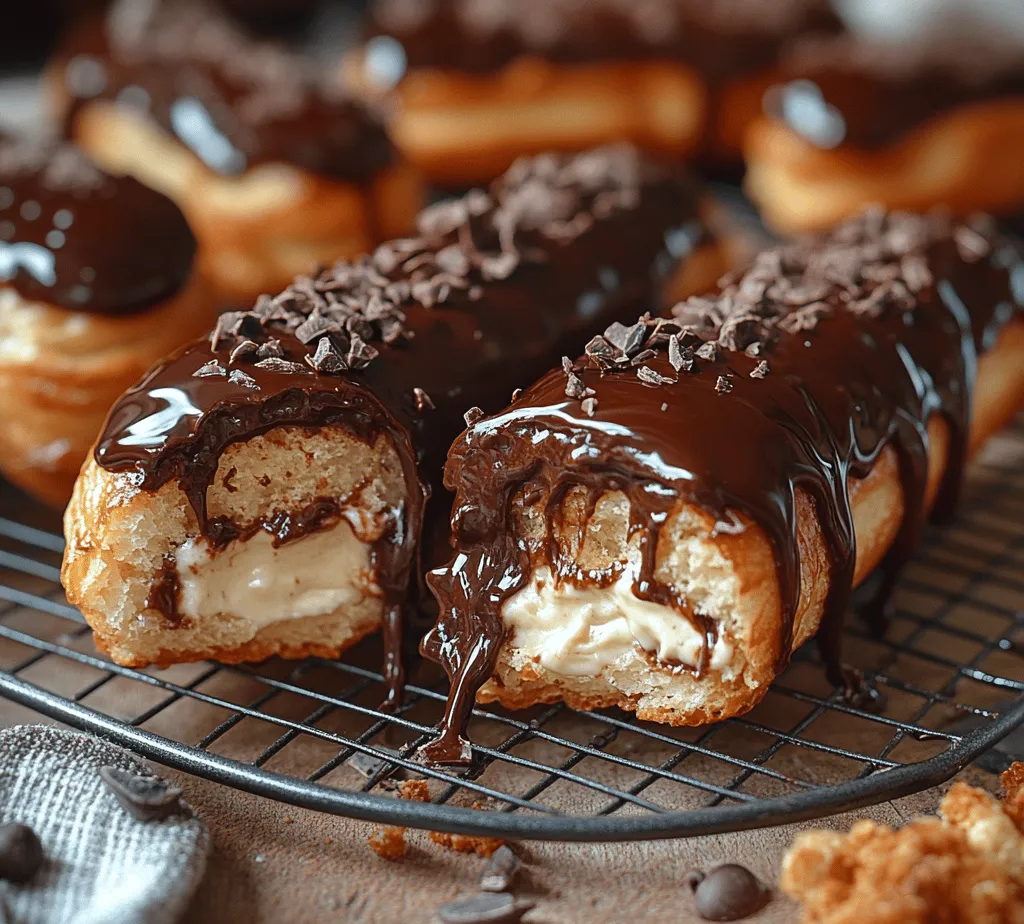
Chocolate éclairs are a timeless classic of French pastry, celebrated for their delicate texture and rich flavors. These elongated pastries, filled with a luscious cream and topped with a glossy chocolate glaze, have enchanted dessert lovers for generations. The appeal of homemade éclairs extends beyond their impressive appearance; the satisfaction derived from mastering this sophisticated delicacy is unparalleled. While they might seem intimidating at first, with a bit of patience and practice, anyone can create these heavenly treats in their own kitchen.
This recipe will guide you through the essential components of making chocolate éclairs: the choux pastry, the velvety pastry cream, and the decadent chocolate glaze. Each element plays a vital role in ensuring that your éclairs not only look stunning but taste absolutely divine.
Understanding Éclairs
The history of éclairs dates back to the 19th century in France, where they have become an integral part of the country’s rich pastry-making tradition. The name “éclair,” which translates to “lightning” in French, is believed to refer to the speed with which these pastries can be consumed. Originally, éclairs were filled with whipped cream or pastry cream and glazed with fondant, but over time, bakers and chefs have experimented with a variety of fillings and toppings, leading to the diverse range of éclairs we see today.
Éclairs hold a special place in French culinary culture, often featured at celebrations and special occasions. They are a symbol of indulgence and craftsmanship, embodying the artistry of pastry chefs. Around the world, variations of éclairs have emerged, with different fillings such as coffee, fruit, or even savory options. These adaptations showcase the versatility of the choux pastry, making éclairs a beloved treat globally.
The Science Behind Choux Pastry
At the heart of every chocolate éclair lies the choux pastry, a unique dough that is quite different from traditional pastry doughs. Choux pastry, or pâte à choux, is made using a simple combination of water, butter, flour, salt, and eggs. What sets choux pastry apart is its ability to puff up dramatically when baked, creating a hollow interior that can be filled with a variety of creams or custards.
The magic of choux pastry lies in the steam produced during baking. As the dough heats up, the water within it transforms into steam, which builds pressure and causes the pastry to rise. This process is crucial for achieving the light and airy texture that éclairs are known for. Additionally, the incorporation of eggs into the dough helps to create a stable structure while contributing to the pastry’s rich flavor.
Making the Perfect Choux Pastry
Creating perfect choux pastry might seem daunting, but with careful attention to detail, it can be accomplished with ease. Here’s a step-by-step guide to ensure your éclairs turn out flawlessly.
Step 1: Preheat the Oven and Prepare the Baking Sheet
Begin by preheating your oven to 425°F (220°C). The high initial temperature is essential for generating steam quickly, which helps the éclairs rise. While the oven is heating up, line a baking sheet with parchment paper. This will prevent the éclairs from sticking while they bake and ensure an even surface for easy removal.
Step 2: Combine Water and Butter
In a medium saucepan, add 1 cup of water and 1/2 cup of unsalted butter, cut into pieces. Place the saucepan over medium heat and allow the butter to melt completely. Stir occasionally to ensure that the butter blends well with the water. It is important to monitor the temperature closely; the mixture should come to a gentle boil but should not be allowed to boil vigorously, which could lead to excess evaporation.
Step 3: Incorporate Flour and Salt
Once the butter has melted and the mixture is boiling, remove the saucepan from the heat. Immediately add 1 cup of all-purpose flour and a pinch of salt to the saucepan, stirring vigorously with a wooden spoon or spatula. Combine the ingredients until a smooth dough forms, pulling away from the sides of the saucepan. The dough should be thick and slightly sticky, with no lumps remaining.
Step 4: Cook the Dough
Return the saucepan to low heat, and continue to cook the dough for an additional 1-2 minutes. This step helps to dry out the mixture slightly, enhancing the texture of the final pastry. You will know it’s ready when a film begins to form on the bottom of the pan, and the dough becomes slightly shiny.
Step 5: Incorporate the Eggs
Transfer the dough to a mixing bowl and allow it to cool for a few minutes. Once the dough is warm but not hot, begin adding the eggs. You will need 4 large eggs for this recipe. Add the eggs one at a time, mixing well after each addition. The dough may initially appear to separate, but keep mixing until it comes together and reaches a smooth, pipeable consistency.
Step 6: Visual Cues and Consistency
The ideal choux pastry should be thick enough to hold its shape but soft enough to pipe easily. A good test is to lift the dough with a spatula; it should fall slowly and form a thick ribbon. If the dough seems too stiff, you can add a little water or an extra egg white to achieve the desired texture.
By following these steps carefully, you will create a light and airy choux pastry that forms the perfect base for your chocolate éclairs. In the next part of this recipe, we will delve into crafting the creamy pastry cream, an essential element that enhances the flavor and indulgence of your éclairs.
Step-by-Step Instructions for Preparing the Pastry Cream
To create the rich and velvety pastry cream that will fill your heavenly chocolate éclairs, follow these detailed steps:
1. Gather Your Ingredients: You will need the following ingredients for the pastry cream:
– 2 cups whole milk
– 3/4 cup granulated sugar
– 1/4 cup cornstarch
– 1/4 teaspoon salt
– 4 large eggs
– 1 teaspoon pure vanilla extract
– 2 tablespoons unsalted butter
2. Combine Dry Ingredients: In a medium saucepan, whisk together the cornstarch, sugar, and salt. This ensures that there are no lumps and that the cornstarch is evenly distributed.
3. Heat the Milk: In a separate saucepan, heat the milk over medium heat until it is just about to simmer. You want to see small bubbles forming around the edges but not a full boil.
4. Temper the Eggs: To prevent curdling, you must temper the eggs. In a bowl, beat the eggs lightly. Slowly add about a cup of the hot milk mixture into the eggs while whisking continuously. This process gradually raises the temperature of the eggs without cooking them. Once combined, pour this egg mixture back into the saucepan with the remaining milk mixture.
5. Thicken the Mixture: Place the saucepan back on the heat and whisk continuously until the mixture thickens and starts to bubble. This should take about 5-7 minutes. Visually, the cream will become thick enough to coat the back of a spoon.
6. Add Butter and Vanilla: Once thickened, remove the saucepan from heat. Stir in the butter and vanilla extract until fully incorporated. The butter adds a beautiful sheen and richness to the cream.
7. Cool the Pastry Cream: Transfer the pastry cream to a bowl and cover it with plastic wrap, pressing the wrap directly onto the surface of the cream to prevent a skin from forming. Allow it to cool to room temperature before refrigerating for at least 2 hours, or until ready to use.
8. Storage Tips: Keep the pastry cream covered in the refrigerator for up to 3 days. If you notice any separation, simply whisk it gently before using.
Creating the Luxurious Chocolate Glaze
The chocolate glaze is the crowning glory of your éclairs, adding both flavor and visual appeal. Here’s how to create a perfect glaze:
1. Overview: The chocolate glaze not only enhances the flavor of the éclairs but also provides a beautiful finish that is glossy and inviting.
2. Ingredients Breakdown:
– 4 ounces semisweet chocolate, chopped
– 2 tablespoons unsalted butter
3. Melting Chocolate and Butter: In a heatproof bowl, combine the chopped semisweet chocolate and butter.
4. Double Boiler Method: Set up a double boiler by placing the bowl over a saucepan of simmering water. Make sure the bowl does not touch the water. Stir continuously until the chocolate and butter are melted and smooth.
5. Achieving the Perfect Glaze Consistency: The glaze should be thick yet pourable. If it’s too thick, you can add a teaspoon of vegetable oil to thin it out slightly. Remove the bowl from the heat and let it sit for a few minutes to cool slightly before using.
Assembling the Éclairs
Now that your pastry cream and chocolate glaze are ready, it’s time to assemble your heavenly éclairs:
1. Filling the Éclairs: Use a pastry bag fitted with a long, narrow tip (like a plain piping tip) to fill the éclairs. Insert the tip into one end of the éclair and gently squeeze the pastry cream into the shell. You’ll feel a slight resistance when the éclair is full, which is a good sign.
2. Creating Openings: If you prefer, you can also cut a small slit on the side of each éclair with a sharp knife to create an opening for filling. This method allows for more control over the filling process.
3. Dipping in Chocolate Glaze: To dip your éclairs in the chocolate glaze, hold the éclair by one end and dip the top half into the glaze. Gently shake off any excess glaze. For a cleaner finish, you can also use a spoon to drizzle the glaze over the éclairs instead of dipping.
Serving Suggestions
To truly elevate your chocolate éclairs, consider the following serving suggestions:
1. Recommended Serving Temperatures: Éclairs are best served chilled, as the pastry cream sets nicely. However, allowing them to sit at room temperature for about 15 minutes before serving can enhance the flavor.
2. Pairing Suggestions: These delightful pastries pair beautifully with a cup of freshly brewed coffee or tea. The natural bitterness of coffee complements the sweetness of the éclairs perfectly.
3. Creative Presentation Ideas: For gatherings or celebrations, consider plating the éclairs on a decorative cake stand. You can also dust them with powdered sugar or cocoa powder for an elegant touch. Adding fresh berries or mint leaves can brighten the presentation.
Conclusion
Making homemade chocolate éclairs is a rewarding experience that combines technique and creativity. With the rich pastry cream, luxurious chocolate glaze, and the satisfying crunch of the choux pastry, every bite is a delight. Don’t be intimidated by the process; each step is an opportunity to learn and master the art of pastry.
As you try this recipe, remember that practice makes perfect. The more you bake, the more comfortable you’ll become with each technique. So roll up your sleeves, gather your ingredients, and indulge in the joy of creating your very own heavenly chocolate éclairs! Enjoy the delicious results and the satisfaction of sharing them with friends and family.