Introduction
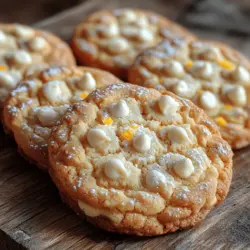
Imagine biting into a cookie that transports you straight back to sun-soaked days of your childhood, where the sweet and tangy taste of orange creamsicles was a summertime staple. This nostalgic flavor is the inspiration behind our Creamsicle Orange Cookies, a delightful treat that captures the essence of those cherished moments. These cookies marry the bright, refreshing notes of orange with the comforting warmth of freshly baked cookies, creating a harmonious balance that is sure to please cookie lovers of all ages.
Baking at home offers a unique joy that is often lost in the hustle and bustle of everyday life. The process of mixing, measuring, and shaping ingredients not only fills your kitchen with irresistible aromas but also allows you to connect with your food and the seasons. Utilizing seasonal ingredients, such as fresh oranges, enhances the flavor profile of your baked goods while also promoting sustainability and supporting local farmers. In this recipe, we will guide you through every step of creating these irresistible Creamsicle Orange Cookies, ensuring that each bite is as delightful as the last.
The Allure of Creamsicle Orange Cookies
The allure of Creamsicle Orange Cookies lies in their nostalgic flavor, reminiscent of those carefree summer days spent enjoying frozen treats. Each cookie embodies the essence of a classic creamsicle, combining the sweetness of vanilla with the vibrant citrus tang of fresh oranges. This delightful fusion not only evokes fond memories but also provides a refreshing twist that makes them perfect for a variety of occasions.
Whether you’re hosting a family gathering, preparing for a holiday celebration, or simply looking for a delicious snack to enjoy with your afternoon tea, these cookies fit the bill. They are versatile and appealing, making them a fantastic addition to any dessert table. The bright orange hue and the added texture from white chocolate chips create an eye-catching treat that is sure to impress guests and family alike.
One of the key aspects of this recipe is the use of fresh oranges, which elevate the flavor profile to new heights. The zest and juice from the oranges provide a depth of flavor that cannot be replicated with artificial flavorings. By incorporating these fresh ingredients, you not only enhance the taste of your cookies but also create a more wholesome treat that is bursting with natural goodness.
Key Ingredients Explained
To create the perfect Creamsicle Orange Cookies, it is essential to understand the role of each ingredient in the recipe. Here’s a closer look at the key components that contribute to the overall flavor and texture of these delightful cookies:
Unsalted Butter
Unsalted butter is a crucial ingredient in most baking recipes, and it plays a significant role in the texture and flavor of our cookies. By using unsalted butter, you have better control over the salt content in your recipe. Butter adds richness and moisture to the cookies, resulting in a tender crumb. It also helps to create a beautiful golden color as the cookies bake, enhancing their visual appeal.
Sugars (Granulated and Brown)
A combination of granulated and brown sugars is used in this recipe to achieve the perfect balance of sweetness and moisture. Granulated sugar contributes to the cookies’ crispness, while brown sugar adds a hint of caramel flavor and helps retain moisture, keeping the cookies soft and chewy. This blend of sugars ensures that each bite is satisfying and delicious.
Egg
The egg is an essential binding agent in baking, providing structure to the cookies. It adds richness and moisture, helping to create a softer texture. In our Creamsicle Orange Cookies, the egg also aids in achieving that perfect chewy consistency that we all love in a cookie.
Orange Zest and Juice
The star of the show is undoubtedly the fresh orange zest and juice. Zesting an orange releases essential oils that contribute a burst of citrus flavor and aroma. When combined with the juice, it creates a vibrant and refreshing taste that embodies the essence of a creamsicle. Using fresh citrus not only improves the flavor but also adds a bright, sunny quality to the cookies, making them irresistible.
Flour, Baking Soda, Baking Powder, and Salt
The backbone of any cookie recipe lies in the dry ingredients. All-purpose flour provides structure and stability, while baking soda and baking powder serve as leavening agents that help the cookies rise. Baking soda contributes to a chewy texture, while baking powder ensures that the cookies maintain their shape. A pinch of salt enhances the overall flavor, balancing the sweetness and bringing out the other ingredients’ natural tastes.
White Chocolate Chips and Optional Nuts
To add an extra layer of flavor and texture to the Creamsicle Orange Cookies, we recommend incorporating white chocolate chips. Their creamy sweetness complements the tangy orange perfectly, creating a delightful contrast in each bite. For those who enjoy a bit of crunch, adding optional nuts, such as macadamia or chopped pecans, can enhance the cookies’ texture while providing additional flavor.
Powdered Sugar for Dusting
As a final touch, a light dusting of powdered sugar adds a touch of elegance and visual appeal to your cookies. It not only enhances their appearance but also provides a subtle sweetness that complements the vibrant flavors of the orange and white chocolate.
Step-by-Step Instructions
Now that we’ve discussed the key ingredients and their roles, it’s time to dive into the step-by-step instructions for making Creamsicle Orange Cookies. Follow these clear and detailed steps to ensure your baking adventure is successful:
Step 1: Preheat Your Oven
Before diving into the mixing process, preheat your oven to 350°F (175°C). This allows the oven to reach the optimal temperature for baking, ensuring that your cookies bake evenly and achieve the perfect texture.
Step 2: Prepare Your Baking Sheet
Line a baking sheet with parchment paper or a silicone baking mat. This will prevent the cookies from sticking and make for easy cleanup after baking. Having your baking sheet ready will streamline the process as you shape and place your cookie dough.
Step 3: Cream the Butter and Sugars
In a large mixing bowl, combine 1 cup of unsalted butter (softened to room temperature) and 1/2 cup of granulated sugar with 1 cup of brown sugar (packed). Using an electric mixer, cream the butter and sugars together until the mixture is light and fluffy. This process typically takes about 2-3 minutes and is crucial for incorporating air into the batter, which contributes to the cookies’ texture.
Step 4: Add the Egg and Orange Ingredients
Once your butter and sugar mixture is fluffy, add in 1 large egg, followed by the zest of 2 oranges and 1/4 cup of fresh orange juice. Mix on low speed until everything is well combined, scraping down the sides of the bowl as needed. The addition of the egg and citrus will enrich the dough, enhancing its flavor and moisture content.
Step 5: Combine the Dry Ingredients
In a separate bowl, whisk together 2 cups of all-purpose flour, 1 teaspoon of baking soda, 1 teaspoon of baking powder, and 1/2 teaspoon of salt. This step ensures that the leavening agents are evenly distributed throughout the flour. Gradually add the dry ingredient mixture to the wet ingredients, mixing on low speed until just combined. Be careful not to overmix, as this could lead to tough cookies.
Step 6: Fold in White Chocolate Chips and Nuts (if using)
Once the dough comes together, gently fold in 1 cup of white chocolate chips and, if desired, 1/2 cup of chopped nuts. The white chocolate chips will melt slightly during baking, creating pockets of creamy sweetness, while the nuts will add a lovely crunch.
Step 7: Scoop and Shape the Dough
Using a cookie scoop or a tablespoon, drop rounded balls of dough onto the prepared baking sheet, spacing them about 2 inches apart to allow for spreading. The cookie dough should be slightly mounded, as they will flatten out during baking.
Step 8: Bake the Cookies
Place the baking sheet in the preheated oven and bake for 10-12 minutes, or until the edges are golden brown and the centers appear set. The cookies may look slightly underbaked in the middle, but they will continue to cook on the baking sheet once removed from the oven.
Step 9: Cool and Dust with Powdered Sugar
After baking, allow the cookies to cool on the baking sheet for about 5 minutes before transferring them to a wire rack to cool completely. Once cooled, dust the cookies lightly with powdered sugar for that perfect finishing touch.
Step 10: Enjoy!
Now that your Creamsicle Orange Cookies are ready, it’s time to share them with family and friends or indulge in a well-deserved treat yourself. The combination of fresh orange flavor, creamy white chocolate, and the delightful texture of the cookies will surely make these a favorite in your home.
By following this simple yet detailed guide, you’ll create cookies that are not only delicious but also infused with the joy of baking and the refreshing taste of oranges. Stay tuned for the next part of the article, where we’ll explore additional tips for achieving the best results and answer some common questions about these delightful treats.
{{image_2}}
Preparation
When embarking on the delightful journey of baking Creamsicle Orange Cookies, the first crucial step is preparation. This begins with preheating your oven to 350°F (175°C). Preheating ensures that your cookies bake evenly and achieve the perfect texture—crispy on the edges and soft in the center. While the oven warms up, take a moment to line your baking sheet with parchment paper. This not only prevents the cookies from sticking but also makes cleanup a breeze. A well-prepared workspace sets the stage for baking success, allowing you to focus on creating these delicious treats.
Creaming Method
The creaming method is a foundational technique in cookie baking that significantly impacts the final texture of your cookies. To start, combine softened butter and sugar in a mixing bowl. Using an electric mixer or a sturdy wooden spoon, beat the mixture until it is light and fluffy. This process typically takes about 3-5 minutes. The incorporation of air during creaming is vital; it creates a lighter texture in the cookies, allowing them to rise properly during baking. The goal is to achieve a pale, creamy consistency that indicates the sugar has dissolved into the butter. Don’t rush this step; it’s essential for the cookies’ soft and tender crumb.
Incorporating Flavors
Once your butter and sugar are creamed to perfection, it’s time to add the wet ingredients—typically eggs and vanilla extract, along with the star ingredient, fresh orange juice and zest. Begin by adding the eggs one at a time, mixing well after each addition to ensure they are fully incorporated. Next, pour in the orange juice and add the zest. It’s important to mix these wet ingredients just until they are combined with the creamed mixture. Overmixing at this stage can lead to dense cookies, so take care to blend gently.
Dry Ingredients Mixing
With your wet ingredients well-mixed, you can now turn your attention to the dry ingredients. In a separate bowl, whisk together the all-purpose flour, baking powder, and a pinch of salt. This helps to evenly distribute the leavening agent and prevents clumping. Gradually add the dry mixture to the wet ingredients, stirring with a spatula or wooden spoon. The key here is to mix just until the flour disappears; overmixing can develop gluten, resulting in tougher cookies. Aim for a dough that is slightly sticky but holds its shape when formed into balls.
Folding Techniques
If you’re looking to elevate your Creamsicle Orange Cookies, consider adding chocolate chips or nuts for additional texture and flavor. Once your dough is mixed, gently fold in these add-ins using a spatula. Be careful not to overwork the dough; a few gentle turns should do the trick. The idea is to evenly distribute the chocolate chips or nuts without deflating the dough. This technique preserves the airy quality achieved during the creaming process, leading to a wonderful cookie texture.
Shaping and Spacing
Now that your cookie dough is ready, it’s time to shape it. Using a cookie scoop or your hands, portion out the dough into equal balls, typically about 1-2 tablespoons each. Place these dough balls onto the prepared baking sheet, ensuring you leave enough space between each one—about 2 inches apart. Proper spacing is crucial; cookies will spread while baking, and adequate space allows them to maintain their shape and not merge into one another. If you prefer a more uniform appearance, you can gently flatten the tops of the dough balls before baking.
Baking Time and Temperature
Your oven should be preheated and your cookies shaped; now it’s time for the baking magic to happen. Place the baking sheet in the center of the oven and bake for about 10-12 minutes, or until the edges are lightly golden brown. Keep an eye on them during the last few minutes; overbaking can lead to dry cookies. They may appear slightly underbaked in the center when you first remove them from the oven, but they will continue to cook on the baking sheet due to residual heat. Allow them to cool for a few minutes before transferring them to a wire rack to cool completely.
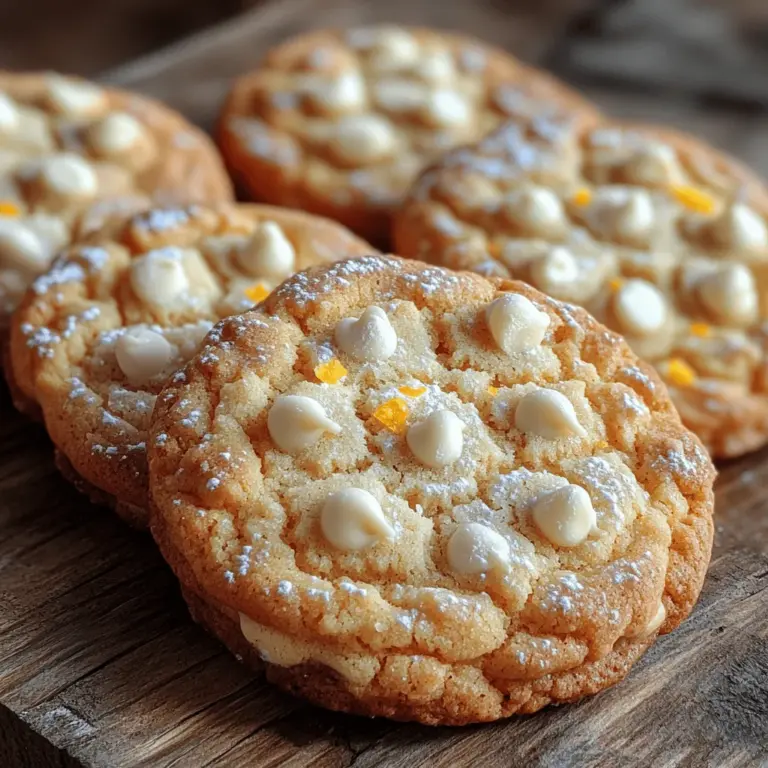
Cooling and Dusting
Cooling your cookies is an important step not to be overlooked. Allow them to rest on the baking sheet for 5-10 minutes before moving them. This helps them set and makes them easier to transfer without breaking. Once fully cooled, you can add a decorative touch by dusting the cookies with powdered sugar. This not only enhances their visual appeal but also adds a sweet contrast to the bright citrus flavor. To dust, simply use a fine sieve or sifter to lightly sprinkle powdered sugar over the top.
Serving Suggestions
Creamsicle Orange Cookies are a delightful treat that pairs beautifully with various beverages. For a classic combination, serve them with a glass of cold milk. The richness of the milk complements the cookies’ sweetness and citrus flavor perfectly. Alternatively, these cookies make a delightful accompaniment to a warm cup of tea or coffee, enhancing your afternoon snack or dessert experience.
When it comes to presentation, consider creating a cookie platter to showcase your Creamsicle Orange Cookies at gatherings or parties. Arrange them alongside other baked goods for an inviting dessert spread. For those looking to share their cookies as gifts, consider packaging them in decorative boxes or clear bags tied with a ribbon. This not only makes for a lovely presentation but also shows your thoughtfulness in sharing homemade treats.
To ensure your cookies maintain their freshness, store them in an airtight container at room temperature. They can last for up to a week, though we doubt they will last that long! For longer storage, consider freezing the cookies. Place them in a single layer in a zip-top bag, separating layers with parchment paper. They can be frozen for up to three months and thawed at room temperature when you need a sweet treat.
Nutritional Information
Understanding the nutritional profile of your Creamsicle Orange Cookies can help you make informed choices. Each cookie is generally around 120-150 calories, depending on size and the amount of chocolate chips or nuts added. These cookies offer a delightful balance of carbohydrates, fats, and proteins, especially when incorporating nuts, which can provide healthy fats and protein. The addition of orange juice and zest not only enhances the flavor but also contributes vitamin C to your treat.
While they are a sweet indulgence, enjoying them in moderation is key. For those who are health-conscious, consider adjusting the recipe by using whole wheat flour or reducing the sugar slightly. Remember, the goal is to savor the flavors while also being mindful of your dietary choices.
Conclusion
Baking Creamsicle Orange Cookies is not just about creating delicious treats; it’s an experience that brings joy and satisfaction. The delightful aroma of fresh orange and sweet cookie dough wafting through your kitchen is enough to make anyone’s day brighter. These cookies, with their unique flavor profile and soft texture, are sure to become a beloved recipe in your collection.
Encourage your loved ones to join you in the kitchen, sharing the joy of baking and creating lasting memories together. Homemade cookies have a special way of bringing people together, whether for a casual afternoon snack or a festive gathering. So gather your ingredients, preheat that oven, and let the baking adventure begin! As you enjoy your Creamsicle Orange Cookies, take a moment to appreciate the love and effort that went into making them. Happy baking!