Introduction
In the realm of desserts, no-bake recipes have carved out a special niche, offering a delightful combination of simplicity and indulgence. They cater to those of us who crave something sweet yet are short on time or energy. Among the myriad of no-bake options, Crunchy Peanut Butter Bliss Bars stand out as the ultimate quick and satisfying treat. These bars are not only easy to make but also deliver a rich, satisfying flavor that appeals to both kids and adults alike.
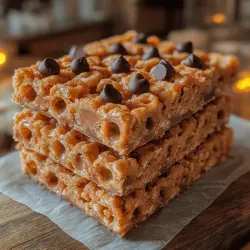
What makes these bliss bars truly irresistible is the harmonious blend of flavors and textures. The creamy peanut butter mingles beautifully with the sweetness of honey or maple syrup, while the crispy Reese’s Puffs cereal provides an enjoyable crunch. Mini chocolate chips add a touch of indulgence, making each bite a delightful experience. This recipe is perfect for a snack on the go, a quick dessert to impress guests, or even a pre- or post-workout boost. Whether you’re hosting a party, packing a lunch, or simply indulging in a sweet craving, Crunchy Peanut Butter Bliss Bars are versatile enough to suit any occasion.
Understanding the Ingredients
To create the perfect Crunchy Peanut Butter Bliss Bars, it’s essential to understand the role of each ingredient. This not only enhances the flavor profile but also ensures the bars achieve the desired texture.
Reese’s Puffs Cereal: A Unique Twist
The star ingredient in this recipe is Reese’s Puffs cereal. While traditional cereal bars often rely on plain rice cereal or oats, using Reese’s Puffs adds a delightful twist. These chocolate and peanut butter-flavored puffs bring a unique sweetness and crunch that elevates the bars to a whole new level. The cereal’s shape and texture also help to hold the bars together, ensuring each bite remains cohesive.
Peanut Butter: Creamy vs. Crunchy
Peanut butter serves as the binding agent and flavor foundation of the bars. Choosing between creamy and crunchy peanut butter is entirely up to personal preference, and both options have their own benefits. Creamy peanut butter creates a smooth, rich base, while crunchy peanut butter introduces additional texture, making each bite even more satisfying. Beyond taste, peanut butter is packed with protein and healthy fats, contributing to the nutritional value of the bars.
Honey or Maple Syrup: Natural Sweeteners
For sweetness, honey or maple syrup are the go-to options in this recipe. Both ingredients offer natural sweetness without the refined sugars found in traditional candy. Honey provides a floral, rich flavor, while maple syrup lends a slightly caramel-like essence. These natural sweeteners not only enhance the overall taste but also help bind the ingredients together, ensuring that every bite is sweet and satisfying.
Mini Chocolate Chips: Adding Sweetness and Indulgence
No dessert is complete without a touch of chocolate, and mini chocolate chips are the perfect addition to our Crunchy Peanut Butter Bliss Bars. They add sweetness and a hint of indulgence, melting slightly into the mixture while still providing little pockets of chocolatey goodness. Opting for dark or semi-sweet chocolate chips can also provide a richer flavor that balances the sweetness of the honey or maple syrup.
Salt and Vanilla Extract: Enhancing Overall Flavor
Finally, a pinch of salt and a splash of vanilla extract are crucial in rounding out the flavors of the bars. Salt enhances the sweetness and richness of the peanut butter and chocolate, while vanilla extract adds a warm, aromatic dimension that elevates the overall taste. Together, these ingredients work harmoniously to create a well-balanced dessert that keeps you coming back for more.
Step-by-Step Guide to Making Crunchy Peanut Butter Bliss Bars
Now that we have a solid understanding of the ingredients, let’s dive into the step-by-step process for making these Crunchy Peanut Butter Bliss Bars. The ease of preparation is one of the most appealing aspects of this recipe, making it accessible even for novice bakers.
Preparing the Pan
The first step in making Crunchy Peanut Butter Bliss Bars is preparing your pan. A 9×9-inch square baking dish is ideal for this recipe. To ensure that the bars don’t stick, line the bottom and sides of the pan with parchment paper, leaving an overhang on the edges. This will make it easier to lift the bars out once they have set. Additionally, lightly greasing the parchment paper with a small amount of cooking spray can further prevent sticking, ensuring a clean release.
Melting the Mixture
Next, it’s time to melt the peanut butter and sweeteners together. In a medium saucepan, combine the peanut butter and honey (or maple syrup) over low heat. The key here is to use low heat and stir continuously to achieve a smooth, even consistency. Melting these ingredients together not only helps to combine the flavors but also makes it easier to incorporate the cereal later on. Be patient during this step—quickly heating the mixture can cause the peanut butter to become too hot and lose its creamy texture.
Adding Flavor
Once the peanut butter and sweetener have melted together, remove the saucepan from the heat. At this point, it’s crucial to add the salt and vanilla extract. These ingredients enhance the overall flavor profile of the bars. Stir them in thoroughly to ensure an even distribution. The aroma of the vanilla will fill your kitchen, making the anticipation of these bars even more exciting.
Combining Ingredients
Now, it’s time to introduce the main event: the Reese’s Puffs cereal. Pour the cereal into the melted peanut butter mixture and use a spatula to coat the cereal evenly. This step is critical for ensuring that every piece of cereal is covered in the delicious peanut butter mixture. It may take a bit of elbow grease, but be gentle to avoid crushing the cereal. The goal is to maintain the cereal’s shape while ensuring every piece is coated.
Incorporating Chocolate Chips
Before transferring the mixture to the prepared pan, consider adding the mini chocolate chips. You can either fold them into the cereal mixture for an even distribution or sprinkle them on top before the bars set. If you choose to mix them in, be mindful of the temperature—the mixture should be warm enough to slightly melt the chocolate chips, creating a delightful marbled effect throughout the bars. If you prefer a more defined chocolate layer, simply scatter the chocolate chips on top of the mixture in the pan after spreading it out.
Transferring and Setting
Once everything is combined, pour the mixture into the prepared pan. Use the spatula to spread it evenly, pressing down firmly to ensure the mixture holds together once it sets. An even layer is essential for achieving uniform bars. After smoothing the top, place the pan in the refrigerator to allow the bars to firm up. It usually takes about 1-2 hours for the bars to set properly, but you can leave them longer if you’re not in a hurry.
By following these steps diligently, you’ll be well on your way to creating delicious Crunchy Peanut Butter Bliss Bars that are sure to impress. The combination of flavors and textures will have your taste buds dancing, and the best part is that they require no baking. Perfect for any occasion, these bars are not just a treat; they’re a celebration of the simple pleasures of dessert.
{{image_2}}
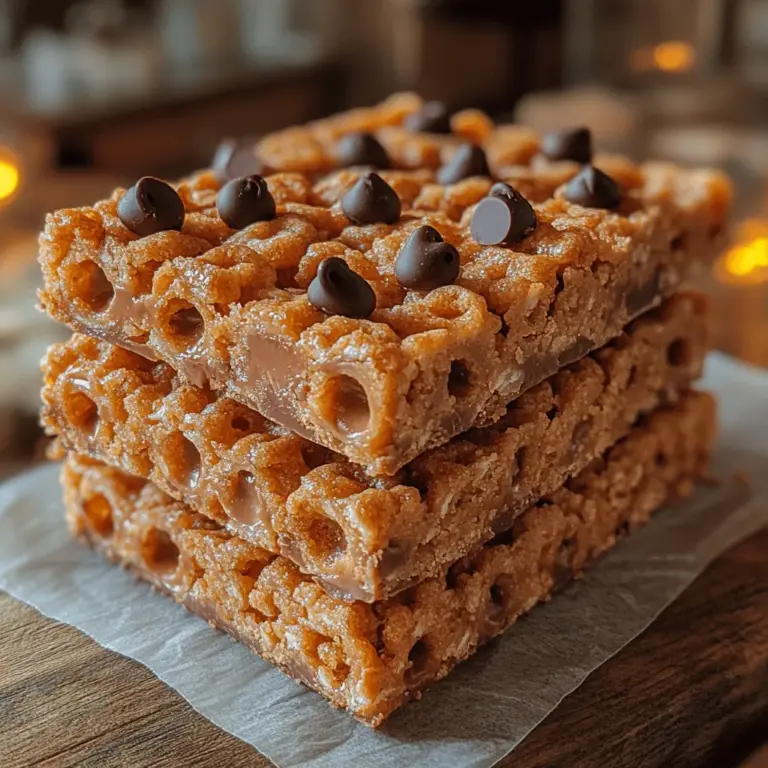
Transferring to the Pan: Proper Pressing Techniques for Optimal Texture
Once your mixture is well combined and the ingredients are thoroughly incorporated, it’s time to transfer it to a baking pan. Start by lining an 8×8 inch or 9×9 inch square pan with parchment paper, allowing some overhang on the sides. This will make it easier to remove the bars later. If you prefer, you can also use a silicone baking pan, which eliminates the need for parchment paper.
Using a spatula or your hands, carefully transfer the peanut butter mixture into the prepared pan. To achieve the perfect texture, it’s crucial to press the mixture firmly and evenly into the pan. Start by spreading the mixture out to cover the bottom of the pan, then use a flat-bottomed measuring cup or your hands to press it down. Make sure the mixture is tightly packed to prevent the bars from crumbling later. Pay special attention to the corners and edges, ensuring that there are no air pockets. The more compact the mix is, the better the overall texture of the bars will be once set.
Chilling Process: Why Chilling is Crucial for Setting the Bars
After you’ve pressed the mixture into the pan, it’s time to chill. This step is essential for allowing the flavors to meld and for the bars to set properly. Place the pan in the refrigerator for at least 1 hour. The chilling process helps the peanut butter, sweeteners, and oats bind together, resulting in a chewy yet crunchy texture.
If you’re in a hurry, you can pop them in the freezer for about 30 minutes. However, be cautious not to leave them too long, as you want the bars to remain firm but not frozen solid. Once chilled, the bars will hold their shape better when cut and served, making for a more enjoyable eating experience.
Cutting and Serving: Techniques for Neat, Aesthetically Pleasing Slices
Once the bars have set in the refrigerator, it’s time to cut them. This step can be straightforward, provided you follow a few techniques for neat slices. First, remove the bars from the pan using the overhanging parchment paper. Place them on a cutting board.
Using a sharp knife, cut the bars into squares or rectangles, depending on your size preference. To achieve clean cuts without crumbling, warm the knife slightly under hot water before slicing, then dry it off. This will ensure a smoother cut through the mixture. For aesthetically pleasing slices, wipe the knife clean between cuts to avoid dragging the mixture and creating a messy appearance.
When serving, you can present the bars on a platter or in an airtight container for easy access. These bars pair wonderfully with a glass of milk or a warm cup of tea, making them a delightful snack or dessert.
Nutritional Information and Health Benefits
Breakdown of Nutritional Content per Serving
With Crunchy Peanut Butter Bliss Bars, you get a delicious treat that also packs a nutritional punch. Each bar typically contains about 150-200 calories, depending on the size and ingredients used. A rough breakdown includes:
– Protein: 5-7 grams
– Carbohydrates: 20-25 grams
– Fat: 6-10 grams
– Fiber: 2-3 grams
– Sugar: 5-7 grams
This makes them a great option for a quick energy boost, especially for those who lead active lifestyles.
Discussion of the Health Benefits of Peanut Butter
Peanut butter is not only a delicious ingredient but also offers numerous health benefits. It is rich in protein and healthy fats, which can help to keep you feeling fuller for longer. The monounsaturated fats found in peanut butter are heart-healthy and can contribute to better cholesterol levels. Additionally, peanut butter contains essential vitamins and minerals such as Vitamin E, magnesium, and potassium, all of which are vital for maintaining overall health.
Analysis of the Balance of Carbs, Fats, and Proteins in the Bars
The balance of macronutrients in these bars makes them an excellent snack option. With a good mix of protein and healthy fats, they provide sustained energy without causing a sugar crash. The carbohydrates primarily come from oats and any added sugars, which offer quick energy release, making them perfect for pre-workout fuel or an afternoon snack.
Suggestions for Modifications to Enhance Nutritional Value
To further enhance the nutritional profile of your Crunchy Peanut Butter Bliss Bars, consider adding ingredients such as chia seeds, flaxseeds, or hemp seeds. These additions will boost the fiber and omega-3 fatty acid content. You can also mix in some dried fruits like cranberries or apricots for added vitamins and natural sweetness. If you’re looking for a boost in antioxidants, consider incorporating dark chocolate chips or cacao nibs.
Creative Variations on the Recipe
Alternative Cereal Options for Different Flavor Profiles
While the original recipe may call for rice cereal, there are plenty of alternative cereals that can be used to create unique flavor profiles. For a more wholesome version, try using whole grain oats or bran flakes. If you want a bit of crunch and a nutty flavor, opt for granola or a nut-based cereal. Each of these options can give your bars a different texture and taste, allowing for creativity in your baking.
Suggestions for Nut Butter Alternatives
If you or someone you know has a peanut allergy, don’t fret! There are several nut butter alternatives that can be used in this recipe. Almond butter, cashew butter, or even sunflower seed butter can provide a similar creamy texture and flavor profile. Each alternative will bring its unique taste, so feel free to experiment based on what you have on hand or personal preferences.
Exploring Mix-Ins: Dried Fruits, Seeds, or Other Chocolate Types
The beauty of Crunchy Peanut Butter Bliss Bars lies in their versatility. You can mix in a variety of ingredients to cater to your taste. Consider adding dried fruits such as raisins, apricots, or banana chips for a hint of sweetness. You can also incorporate seeds like sunflower seeds, pumpkin seeds, or even chia seeds for added crunch and nutrition. If you’re a chocolate lover, try using milk chocolate, dark chocolate, or even white chocolate chips to create a richer flavor.
Ideas for Making the Bars Vegan or Gluten-Free
For those following a vegan diet, it’s simple to make these bars vegan-friendly by opting for plant-based sweeteners, such as maple syrup or agave nectar, instead of honey. Additionally, ensure that your chosen cereal and any chocolate chips used are certified vegan. To make the bars gluten-free, verify that the oats and cereal are labeled gluten-free, as cross-contamination can occur during processing.
Storage and Shelf Life
Best Practices for Storing Crunchy Peanut Butter Bliss Bars
Proper storage is key to maintaining the freshness and texture of your Crunchy Peanut Butter Bliss Bars. After cutting, place the bars in an airtight container lined with parchment paper to prevent sticking. This method will help keep them fresh for longer and maintain their delicious texture.
Discussion of How to Keep Them Fresh and Maintain Texture
If you find yourself with leftovers (which is often rare!), make sure to store them in a cool, dry place, away from direct sunlight. For extended freshness, refrigeration is recommended. Keeping the bars chilled will prevent them from becoming too soft and will help maintain their crunch.
Shelf Life at Room Temperature vs. Refrigeration
At room temperature, Crunchy Peanut Butter Bliss Bars can last about a week if stored properly. However, if you refrigerate them, they can last up to two weeks. For longer storage, consider freezing them. Wrap each bar individually in plastic wrap and then place them in a freezer-safe bag. They can be stored in the freezer for up to three months, making them an excellent choice for meal prepping snacks or treats.
Conclusion
Crunchy Peanut Butter Bliss Bars are not only easy to make, but they also deliver a satisfying combination of flavors and textures. Whether you’re looking for a quick snack, a post-workout boost, or a delightful treat for any occasion, these bars fit the bill perfectly. The simplicity of the recipe allows for endless customization, so don’t hesitate to experiment with different flavors and ingredients to make them your own.
With their wholesome ingredients and nutritional benefits, these bars are sure to become a staple in your kitchen. Enjoy the process of creating, and let your creativity shine as you personalize this delicious recipe. Happy baking, and may your Crunchy Peanut Butter Bliss Bars bring joy to your taste buds and nourishment to your body!