Decadent No-Bake Chocolate Peanut Butter Bars: A Delight for the Senses
No-bake desserts have carved out a special niche in the world of treats, offering a perfect blend of convenience and indulgence. With minimal effort and no need for an oven, these desserts are a go-to for those who crave something sweet without the fuss. Among the myriad of no-bake options, the combination of chocolate and peanut butter stands out as a timeless classic—rich, creamy, and utterly satisfying. The Decadent No-Bake Chocolate Peanut Butter Bars are no exception, effortlessly combining these two beloved flavors into a delightful treat that appeals to both kids and adults alike.
This recipe shines not only for its incredible taste but also for its simplicity. In just a few steps, you can create a batch of these bars that will impress at any gathering, from birthday parties to picnics. Whether you’re looking for a quick dessert fix or a special treat to share, these bars are versatile enough to suit any occasion.
The Allure of No-Bake Desserts
No-bake desserts have gained popularity for several compelling reasons. First and foremost, they eliminate the need for baking, making them ideal for warm weather when turning on the oven can heat up your kitchen. They are also perfect for those moments when you want a quick sweet fix without dedicating hours to the baking process. The simplicity of no-bake recipes often allows for minimal clean-up, making them incredibly appealing to busy home cooks.
Moreover, the versatility of no-bake desserts is unmatched. With a base of graham crackers or oats, you can experiment with a variety of flavors—from fruity to nutty to chocolaty. The ability to customize these desserts with your favorite ingredients means that you can create something unique that reflects your personal taste or fits dietary needs. The Decadent No-Bake Chocolate Peanut Butter Bars exemplify this versatility by offering a simple yet delicious framework that can be tweaked with various add-ins or toppings.
Ingredients Breakdown
To create these delectable bars, you will need a handful of straightforward ingredients, each playing a crucial role in the final outcome. Let’s break down each component:
1. Graham Cracker Crumbs: The foundation of the bars, graham cracker crumbs provide a crunchy texture that contrasts beautifully with the smooth peanut butter and chocolate layers. They add a hint of sweetness, making them an ideal base for no-bake desserts.
2. Unsweetened Cocoa Powder: This ingredient enhances the chocolate flavor without adding extra sugar. By using unsweetened cocoa powder, you ensure that the bars maintain a rich, chocolatey taste that isn’t overly sweet, allowing the natural flavors of the peanut butter to shine through.
3. Creamy Peanut Butter: The star of the show, creamy peanut butter lends a rich, nutty flavor and a delightful, smooth texture to the bars. It serves as a binding agent, ensuring that the other ingredients stick together while adding its delicious taste.
4. Maple Syrup or Honey: These natural sweeteners not only provide sweetness but also contribute moisture to the mixture. Maple syrup offers a unique flavor profile, while honey adds its own distinct sweetness, allowing for flexibility depending on personal preference.
5. Vanilla Extract: A simple yet essential ingredient, vanilla extract adds depth and complexity to the flavor of the bars. Its aromatic qualities enhance the other ingredients, making the overall taste more rounded and satisfying.
6. Powdered Sugar (Optional): For those who enjoy a sweeter treat, powdered sugar can be added to the mixture. This ingredient can adjust the sweetness level to your liking and helps create a more indulgent texture.
7. Semi-Sweet Chocolate Chips: The crowning glory of these bars, semi-sweet chocolate chips provide an indulgent topping that is both visually appealing and delicious. Melting them down creates a smooth, glossy finish that enhances the overall presentation of the dessert.
8. Coconut Oil: Used in melting the chocolate, coconut oil ensures a smooth consistency and helps the chocolate adhere to the bars without clumping. It also adds a subtle flavor that complements the other ingredients beautifully.
Step-by-Step Instructions
Now that we have a thorough understanding of the ingredients, let’s dive into the step-by-step instructions for preparing these Decadent No-Bake Chocolate Peanut Butter Bars. Follow these detailed steps to ensure success:
1. Prepare the Base: Start by gathering your graham cracker crumbs and unsweetened cocoa powder in a large mixing bowl. The ratio of these two ingredients is crucial, as it forms the foundation of your bars. Combine them thoroughly, ensuring an even distribution of the cocoa powder throughout the crumbs.
2. Mix in the Peanut Butter: Next, add the creamy peanut butter to the dry mixture. Using a spatula or wooden spoon, blend the peanut butter with the graham cracker crumbs and cocoa powder until the mixture is well combined. The consistency should resemble damp sand, sticking together when pressed.
3. Sweeten and Flavor: Pour in the maple syrup or honey, followed by the vanilla extract. Continue mixing until the wet ingredients are fully incorporated. This step is essential as it balances the flavors and adds moisture to the base.
4. Adjust Sweetness (if desired): If you prefer a sweeter bar, gradually add powdered sugar to the mixture. Start with a small amount and taste as you go, adjusting to your personal preference.
5. Press the Mixture into a Pan: Line an 8×8-inch baking dish with parchment paper for easy removal. Transfer the mixture into the prepared pan and press it down firmly using the back of a spatula or your hands. Ensure an even layer to create a solid base for the bars.
6. Melt the Chocolate: In a microwave-safe bowl, combine the semi-sweet chocolate chips and coconut oil. Heat in the microwave in 30-second intervals, stirring between each session until the chocolate is completely melted and smooth.
7. Spread the Chocolate: Once melted, pour the chocolate mixture over the pressed base, using a spatula to spread it evenly across the surface. This layer adds a rich, glossy finish and extra indulgence to your bars.
8. Chill Until Set: Finally, place the baking dish in the refrigerator for at least 2 hours or until the bars are firm. This chilling time allows the flavors to meld together and the structure to set properly.
With these initial steps, you’re well on your way to creating a batch of Decadent No-Bake Chocolate Peanut Butter Bars that are sure to satisfy any sweet tooth. The combination of flavors and textures promises to be a hit, making these bars a staple in your dessert repertoire. Stay tuned for the next part of the article, where we will explore additional tips, variations, and serving suggestions for this delightful treat.
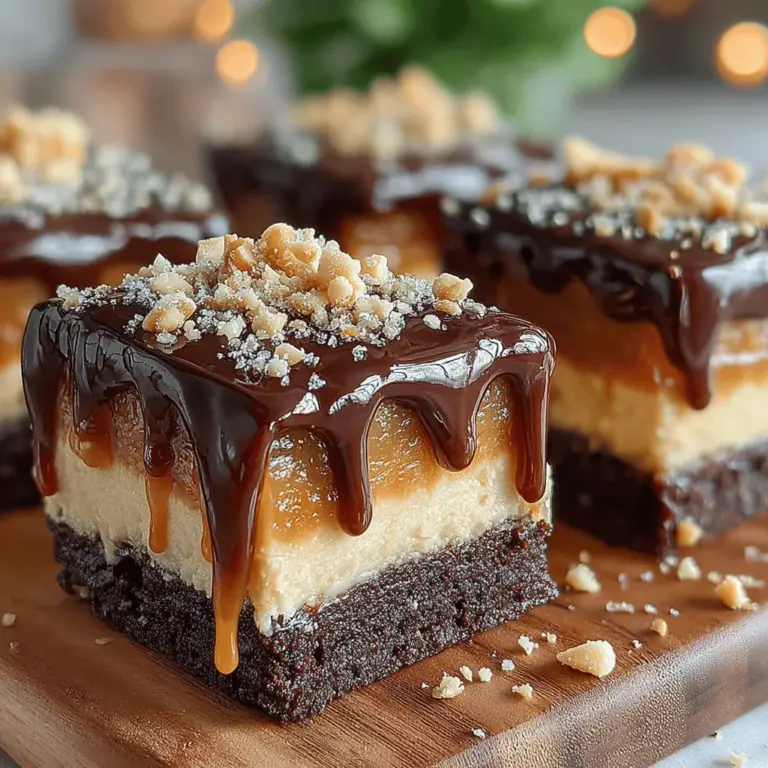
{{image_2}}
Creating the Peanut Butter Mixture for Depth of Flavor
To create a rich and flavorful peanut butter mixture, begin by placing 1 cup of creamy or crunchy peanut butter in a mixing bowl. If you’re looking to enhance the flavor profile, consider adding a teaspoon of vanilla extract. This simple addition elevates the overall taste and brings a wonderful aromatic quality to your bars. For a touch of sweetness, mix in 1/3 cup of maple syrup or honey, depending on your preference. These natural sweeteners not only add sweetness but also bind the mixture, giving your bars the right consistency.
Once you’ve combined these ingredients, stir until they are smooth and fully integrated. This will ensure that every bite of your chocolate peanut butter bars is infused with that delightful peanut buttery goodness.
Combining the Mixtures for a Cohesive Batter
Next, it’s time to combine your peanut butter mixture with the dry ingredients. In a separate bowl, whisk together 1 cup of rolled oats (you can use gluten-free oats if necessary), 1/2 cup of cocoa powder, and a pinch of salt. The cocoa powder will give your bars their signature chocolate flavor, while the oats provide texture and a wholesome element.
Gradually add the dry mixture to the peanut butter mixture, stirring continuously. The goal here is to create a cohesive batter that holds together well. If the mixture feels too dry, you can add a tablespoon of milk (dairy or non-dairy) to help bind it. Conversely, if it seems too wet, add a few more oats until the desired consistency is reached. Once fully combined, the batter should be thick and slightly sticky, making it easy to press into your pan.
Pressing the Mixture into the Pan for Even Distribution
Now that your batter is ready, it’s time to transfer it into a lined baking pan. Use an 8×8-inch square pan for optimal thickness. Line the pan with parchment paper, leaving a slight overhang on the sides for easy removal later. This will also prevent the bars from sticking.
Spoon the mixture into the prepared pan, and with clean hands or a spatula, press it down firmly and evenly. Make sure to spread the mixture to the corners and edges of the pan for uniformity. This step is crucial as it ensures that each bar will have the same thickness and texture. Once pressed evenly, set the pan aside while you prepare the chocolate topping.
Melting Chocolate and Coconut Oil for the Topping
For the decadent topping, you’ll need 1 cup of chocolate chips (dark or semi-sweet) and 2 tablespoons of coconut oil. In a microwave-safe bowl, combine the chocolate chips and coconut oil, then microwave in 30-second intervals, stirring in between, until melted and smooth. The coconut oil not only aids in melting but also gives the chocolate a glossy finish and helps it solidify nicely on top of the bars.
Once melted, pour the chocolate mixture over the pressed peanut butter base, using a spatula to spread it evenly across the top. This layer of chocolate not only adds a luscious richness but also creates a beautiful presentation for your bars.
Chilling Time and Importance for Texture
After adding the chocolate topping, it’s crucial to chill the bars in the refrigerator. Cover the pan with plastic wrap or foil and let it chill for at least 2-3 hours, or until the chocolate has set completely. This chilling period is essential for achieving the perfect texture; it allows the bars to firm up, making them easy to cut into squares without crumbling.
Once chilled, remove the bars from the pan using the parchment paper overhang, and cut them into squares or rectangles, depending on your preference.
Tips for Perfecting Your Bars
– Suggestions on Ingredient Substitutions: If you have allergies or dietary preferences, feel free to substitute the peanut butter with almond butter, cashew butter, or sunflower seed butter. For sweeteners, agave syrup or brown rice syrup can be great alternatives.
– Importance of Measuring Ingredients Accurately: Accurate measurement of ingredients is critical for the success of this recipe. Use a kitchen scale for precision, especially with dry ingredients like oats and cocoa powder, to ensure your bars turn out perfectly every time.
– Discussing Potential Variations: Don’t hesitate to get creative! You can add in chopped nuts, shredded coconut, or even dried fruits for added texture and flavor. For a bit of crunch, consider sprinkling some sea salt on top of the chocolate layer before chilling.
Serving Suggestions and Pairings
These no-bake chocolate peanut butter bars are delicious on their own, but they can also be elevated with a few serving suggestions. For a decadent dessert, serve them alongside a scoop of vanilla ice cream or a dollop of whipped cream. The contrast between the creamy ice cream and the rich bars is a flavor explosion.
Pair them with beverages that complement their rich flavors. A cup of freshly brewed coffee, a tall glass of cold milk, or even a soothing herbal tea can enhance your enjoyment of these bars. The bitterness of coffee balances the sweetness, while milk adds a nostalgic touch.
Storing and Shelf Life
To maintain the freshness of your chocolate peanut butter bars, proper storage is key. Place them in an airtight container and store them in the refrigerator. They will last for up to one week. For longer storage, you can freeze the bars. Wrap them individually in plastic wrap and place them in a freezer-safe container or bag. They can last for up to three months in the freezer, making them a great make-ahead treat.
Nutritional Information
These no-bake chocolate peanut butter bars not only satisfy your sweet tooth but also offer nutritional benefits. Peanut butter is a fantastic source of protein, which helps keep you feeling full longer. Cocoa powder is rich in antioxidants, which can provide health benefits, including improved heart health. Oats are a good source of fiber, aiding digestion and promoting heart health. When enjoyed in moderation, these bars strike a beautiful balance between indulgence and nutrition, making them a guilt-free treat.
Conclusion
In summary, these decadent no-bake chocolate peanut butter bars are an easy and delightful treat that anyone can whip up in their kitchen. With their rich flavors and satisfying textures, they are perfect for any occasion, whether you’re hosting a gathering or simply craving something sweet. The joy of making and sharing these bars is undeniable, and their versatility allows for endless variations to suit your taste.
We encourage you to try this recipe and experience the delightful combination of chocolate and peanut butter. Whether you enjoy them on their own, paired with ice cream, or share them with friends and family, these bars are sure to be a hit. Happy baking!
