Introduction
Chocolate cheesecakes hold a special place in the hearts of dessert lovers around the world. Their rich, creamy texture combined with the indulgent flavor of chocolate makes them a beloved treat for any occasion. Among the myriad of chocolate cheesecake recipes, the Heavenly Godiva Chocolate Cheesecake Delight stands out as a true showstopper. This dessert is not just a feast for the taste buds; it is also a visually stunning centerpiece that elevates any gathering or celebration.
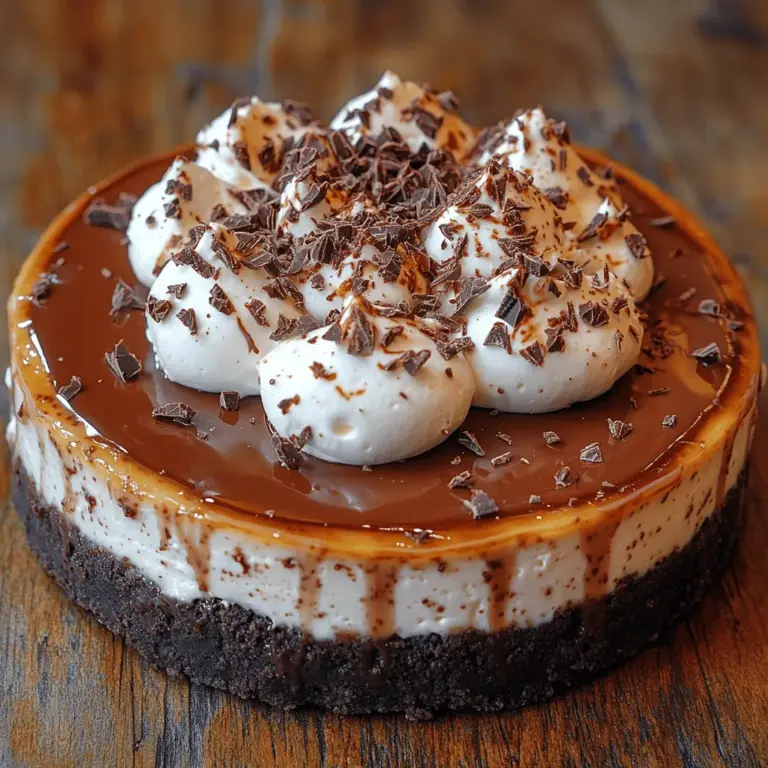
Imagine a velvety cheesecake infused with the luxurious taste of Godiva chocolate, resting on a perfectly crisp Oreo cookie crust. The blend of flavors and textures in this cheesecake is a celebration of chocolate in its finest form. Whether you are hosting a birthday party, an anniversary, or simply indulging in a sweet treat at home, this cheesecake is bound to impress your guests and leave them craving more.
What sets this recipe apart is not just its exquisite taste but also the use of high-quality ingredients that contribute to its indulgent nature. Every bite of the Heavenly Godiva Chocolate Cheesecake Delight is a harmonious marriage of rich chocolate, creamy filling, and a delightful crunch, making it a must-try for any cheesecake enthusiast.
Understanding the Ingredients
To create a cheesecake that lives up to its heavenly name, it is crucial to understand the role of each ingredient. The quality of your ingredients can significantly influence the flavor and texture of the final product. Here’s a breakdown of the key components of this delectable dessert:
Oreo Cookie Crumbs
The foundation of the Heavenly Godiva Chocolate Cheesecake Delight begins with the crust, made from Oreo cookie crumbs. The sweetness and chocolatey flavor of the Oreos provide a perfect contrast to the rich and creamy filling. The crumb texture is essential; it should be fine enough to create a smooth base but still have enough substance to hold together when pressed into the pan.
Cream Cheese
Cream cheese is the star of the cheesecake filling, providing the rich, creamy texture that characterizes traditional cheesecakes. Using high-quality, softened cream cheese is essential for achieving a smooth and lump-free filling. It is important to let the cream cheese come to room temperature before mixing, as this helps it blend seamlessly with the other ingredients, resulting in a luxurious texture.
Godiva Chocolate
No chocolate cheesecake would be complete without chocolate, and in this recipe, Godiva chocolate takes center stage. Known for its rich, decadent flavor, Godiva chocolate enhances the cheesecake, giving it a deep chocolatey taste that is both sophisticated and indulgent. The use of premium chocolate is key to elevating the overall flavor profile of the dessert.
Sour Cream and Heavy Cream
To balance out the richness of the cream cheese and chocolate, sour cream is incorporated into the filling. It adds a subtle tang that enhances the flavor complexity and contributes to a creamy texture. Heavy cream is also used in the filling, which helps to create a luscious, velvety consistency that melts in your mouth.
When preparing this cheesecake, sourcing high-quality ingredients is essential. Invest in good-quality Godiva chocolate, fresh cream cheese, and organic eggs for the best results. Quality ingredients not only improve the flavor but also make the overall baking process more enjoyable.
Crafting the Perfect Crust
Now that we have a clear understanding of the essential ingredients, let’s dive into the first step of bringing the Heavenly Godiva Chocolate Cheesecake Delight to life: crafting the perfect crust.
Step-by-Step Guide to Preparing the Oreo Cookie Crust
1. Gather Your Ingredients: You will need about 24 Oreo cookies (regular or double-stuffed, depending on your preference) and approximately 5 tablespoons of unsalted butter, melted.
2. Crush the Oreos: Start by placing the Oreo cookies in a food processor. Pulse until they reach a fine crumb consistency. If you don’t have a food processor, you can also place the cookies in a resealable plastic bag and crush them using a rolling pin.
3. Combine with Butter: In a mixing bowl, combine the crushed Oreo crumbs with the melted butter. Mix until the crumbs are evenly coated and the mixture resembles wet sand. The butter helps bind the crumbs together, which is crucial for forming a sturdy crust.
4. Press into the Pan: Grease a 9-inch springform pan lightly to prevent sticking. Pour the Oreo crumb mixture into the pan and use the back of a measuring cup or your fingers to press it firmly and evenly across the bottom. Ensure that the crust is compact to prevent it from crumbling when sliced.
5. Pre-Bake the Crust: Preheat your oven to 350°F (175°C). Place the crust in the oven and bake for about 10 minutes. Pre-baking the crust helps set it, giving it a firmer texture and preventing it from becoming soggy when the filling is added.
Tips for the Right Consistency
Achieving the ideal consistency for your Oreo crust is vital. If the mixture feels too dry, add a little more melted butter, one teaspoon at a time, until it holds together well. Conversely, if it feels too wet, add a few more cookie crumbs. The goal is to have a mixture that holds its shape when pressed but isn’t overly greasy.
Exploring Variations in Crusts
While the Oreo crust is a classic choice for chocolate cheesecakes, you can experiment with different crust options to suit your taste or dietary preferences. For a more traditional flavor, consider using graham cracker crumbs. Alternatively, you can try other types of cookies, such as chocolate chip, peanut butter, or even gluten-free cookies, to cater to various dietary needs.
The crust is the first layer of flavor in the Heavenly Godiva Chocolate Cheesecake Delight, setting the stage for the creamy filling that follows. By taking the time to prepare a perfect crust, you lay the foundation for a truly indulgent dessert experience.
Creating a Luxurious Cheesecake Filling
Once the crust is pre-baked and cooling, it’s time to move on to creating the luxurious cheesecake filling that will elevate this dessert to new heights.
Detailed Process of Making the Cheesecake Filling
1. Prepare the Cream Cheese: Begin by ensuring that your cream cheese is at room temperature. This is crucial for mixing it smoothly with the other ingredients. If you forget to take it out in advance, you can cut it into smaller pieces and microwave it for about 10 seconds. Just be careful not to melt it.
2. Mix the Filling Ingredients: In a large mixing bowl, add the softened cream cheese and beat it with an electric mixer until smooth and creamy. This usually takes about 2-3 minutes on medium speed. Make sure to scrape down the sides of the bowl to incorporate all the cream cheese.
3. Add the Godiva Chocolate: Melt approximately 8 ounces of Godiva chocolate using a double boiler or microwave. If using the microwave, heat in 30-second intervals, stirring in between, until fully melted. Allow the chocolate to cool slightly before adding it to the cream cheese mixture. This prevents the heat from affecting the texture of the filling.
4. Incorporate Sour Cream and Heavy Cream: Add in 1 cup of sour cream and 1/2 cup of heavy cream to the cream cheese and chocolate mixture. Mix on low speed until well combined. The sour cream adds a lovely tang, while the heavy cream contributes to the filling’s richness.
5. Add Sugar and Vanilla: Sweeten the mixture with 3/4 cup of granulated sugar and a teaspoon of pure vanilla extract. Beat the mixture until it is well blended, being careful not to overmix, as this can introduce excess air into the filling. Overmixing can lead to cracks in your cheesecake during baking.
Balancing the Flavors
The key to a successful cheesecake filling is balancing the flavors and achieving a smooth consistency. The combination of chocolate, cream cheese, sour cream, and heavy cream creates a rich, decadent filling that is sure to impress.
Once your filling is prepared, it’s ready to be poured into the pre-baked Oreo crust. This is where the magic happens, as the filling transforms into a heavenly cheesecake during the baking process.
By understanding the roles of each ingredient and following these detailed steps, you are well on your way to creating a Heavenly Godiva Chocolate Cheesecake Delight that will leave everyone wanting more. Stay tuned for the next part, where we will explore the baking process to ensure your cheesecake is perfect every time.
{{image_2}}
Baking the Cheesecake to Perfection
When it comes to baking the Heavenly Godiva Chocolate Cheesecake, precision is key. The right temperature and timing are critical to achieving that creamy, velvety texture that makes this dessert so irresistible. It is essential to preheat your oven to the specified temperature in your recipe, typically around 325°F (163°C). This allows for even cooking and prevents the cheesecake from cracking, a common issue resulting from sudden temperature changes.
The “Slightly Jiggly” Test for Doneness
As your cheesecake bakes, keep an eye on it during the final stages. To check for doneness, use the “slightly jiggly” test. The edges should appear set, while the center should still have a slight jiggle when gently shaken. This is a sign that the cheesecake is perfectly cooked, as it will continue to firm up while cooling. Underbaking slightly is preferable to overbaking, which can lead to a dry texture.
Cooling Techniques to Prevent Cracks
Once your cheesecake is out of the oven, the next step is cooling it gradually. Rapid temperature changes can cause cracks, which can be unsightly and reduce the overall appeal of your cheesecake. To cool your cheesecake properly, turn off the oven and crack the door open, allowing the cheesecake to cool in the oven for about an hour. This gradual cooling helps prevent a sudden drop in temperature. After this initial phase, transfer the cheesecake to the countertop and allow it to cool completely at room temperature before refrigerating it.
The Science Behind Cheesecake Baking and Cooling
Understanding the science behind cheesecake can elevate your baking game. Cheesecakes rely on a delicate balance of ingredients, primarily cream cheese, eggs, and sugar, which need to be combined and baked gently. The proteins in the eggs coagulate as they heat, providing structure, while the cream cheese adds creaminess. Cooling the cheesecake slowly allows moisture to escape without forming cracks and prevents the filling from becoming rubbery. This process not only enhances texture but also deepens flavors, resulting in a dessert that is rich and indulgent.
Preparing the Decadent Ganache Topping
No cheesecake is complete without a luscious ganache topping. The ganache for your Heavenly Godiva Chocolate Cheesecake will add an extra layer of richness and visual appeal.
Step-by-Step Instructions for Making Chocolate Ganache
To make the ganache, start by finely chopping 8 ounces of high-quality dark chocolate. Place the chocolate in a heatproof bowl. In a saucepan, heat 1 cup of heavy cream over medium heat until it just begins to simmer. Pour the hot cream over the chopped chocolate and let it sit for about five minutes. This resting period allows the chocolate to soften. After five minutes, gently stir the mixture until smooth and glossy, ensuring the chocolate is fully melted and incorporated.
Importance of Using High-Quality Chocolate
Using high-quality chocolate is crucial for the ganache’s flavor and texture. Look for chocolate with a cocoa content of 60-70%, as this will provide a rich, deep chocolate flavor that complements the cheesecake without overwhelming it. Brands like Godiva, Ghirardelli, or Callebaut are excellent choices that will elevate your dessert.
Tips for Achieving the Perfect Pourable Consistency
For the perfect pourable ganache consistency, ensure that the chocolate is finely chopped for even melting. If the ganache feels too thick after mixing, you can stir in a small amount of additional warm cream to achieve your desired consistency. Conversely, if the ganache is too thin, allow it to cool slightly, as it will thicken as it cools.
Suggestions for Variations in Ganache Flavors or Additions
While a classic chocolate ganache is divine, feel free to experiment with flavors. Consider adding a splash of vanilla extract, a dash of espresso powder, or even a tablespoon of flavored liqueurs such as coffee or orange liqueur for a unique twist. You can also fold in a bit of peanut butter or caramel sauce for a delightful variation that pairs beautifully with chocolate.
Chilling and Serving the Cheesecake
After preparing your ganache, it’s time to chill and serve your Heavenly Godiva Chocolate Cheesecake.
Importance of Chilling the Cheesecake
Chilling the cheesecake is essential for setting the texture and enhancing the flavor. Ideally, allow your cheesecake to chill in the refrigerator for at least 4 hours, but overnight is even better. This extended chilling time allows the flavors to meld beautifully and results in a firmer slice.
Guide on How to Properly Slice and Serve the Cheesecake
To serve your cheesecake, start by removing it from the springform pan. If you’ve lined the bottom with parchment paper, gently lift it out. Place the cheesecake on a decorative serving plate. To cut neat slices, use a sharp knife dipped in hot water. Wipe the blade with a clean cloth between cuts to maintain clean edges.
Techniques for Neat Slicing Using a Hot Knife
Dipping your knife in hot water will make slicing through the dense cheesecake much easier, preventing it from crumbling. This technique is particularly useful for cheesecakes, which can be notoriously tricky to slice without ruining the presentation.
Ideas for Garnishing the Cheesecake
To enhance the presentation of your cheesecake, consider garnishing it with fresh berries, chocolate shavings, or a drizzle of caramel or raspberry sauce. Whipped cream can also add a light touch that contrasts nicely with the rich cheesecake. For a sophisticated touch, sprinkle some sea salt over the ganache topping to enhance the chocolate flavor.
Exploring Variations and Pairings
This Heavenly Godiva Chocolate Cheesecake recipe is versatile, allowing for numerous variations and pairings.
Suggestions for Variations on the Base Recipe
You can easily customize this cheesecake by adding ingredients like fruit or flavored liqueurs to the batter. For instance, incorporating fresh raspberries or cherries can add a tart contrast to the rich chocolate, while a splash of mint or orange liqueur can bring a refreshing twist to the dessert.
Discussion on Complementary Flavors and Drink Pairings
Consider pairing your cheesecake with complementary flavors. A rich cup of coffee or a dessert wine such as port or a sweet Riesling can elevate the experience. If you prefer something non-alcoholic, a scoop of vanilla ice cream or a dollop of whipped cream can balance the rich chocolate flavor.
Ideas for Serving the Cheesecake in Different Settings
The Heavenly Godiva Chocolate Cheesecake is perfect for various occasions. Whether hosting a dinner party, celebrating a holiday, or simply enjoying a cozy night in, this dessert is sure to impress. Serve it as a grand finale to a multi-course meal or as a special treat for a loved one. It also makes a delightful gift when wrapped beautifully.
Conclusion
The Heavenly Godiva Chocolate Cheesecake Delight is not just a dessert; it’s a show-stopping experience that embodies indulgence and flavor. With its rich chocolate flavor, creamy texture, and elegant ganache topping, it is the perfect treat for any occasion. We encourage you to create and savor this cheesecake, as it is a testament to the joy of baking and sharing delicious desserts with loved ones. Embrace the process, enjoy the rich flavors, and celebrate the moments spent around the table with family and friends. Happy baking!
